How to Monitor Security Cameras with Ivideon App?
In today’s world, security is paramount for homes, offices, and businesses. One of the best ways to enhance security is by setting up surveillance cameras that can help monitor activities 24/7. Ivideon is one of the leading cloud-based security solutions that allow users to view their cameras remotely on their mobile devices or computers. If you're looking to set up Ivideon to monitor your security cameras, follow this comprehensive guide to get started.
What is Ivideon?
Ivideon is a cloud-based video surveillance solution that offers users the ability to monitor live video streams from their security cameras from anywhere in the world. It supports various camera types, including IP cameras, CCTV, and webcams, and allows users to store footage in the cloud for easy access and management. Ivideon also offers features like motion detection, alerts, and multi-camera support.
Why Choose Ivideon for Security Camera Monitoring?
Before diving into the setup process, it’s important to understand why Ivideon is a preferred choice for monitoring security cameras.
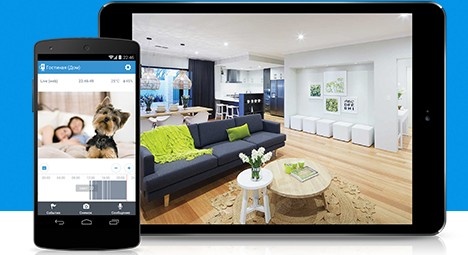
Remote Access: With Ivideon, you can monitor live video feeds from your security cameras on your smartphone, tablet, or computer. This remote access ensures you can keep an eye on your property at all times, no matter where you are.
Cloud Storage: Ivideon allows you to store your security footage in the cloud, freeing up local storage on your devices and providing an easy backup solution in case of device failure.
Easy Setup: Ivideon is user-friendly, and its setup process is straightforward. You don’t need to be a tech expert to get started with the app.
Motion Detection & Alerts: Ivideon’s motion detection feature sends you instant notifications when any unusual activity is detected. This ensures that you're always alerted about potential threats.
Multi-Camera Support: You can connect multiple security cameras to Ivideon and monitor all of them from one interface, making it ideal for larger properties or businesses.
Affordable Plans: Ivideon offers different subscription plans, including a free plan, making it accessible for all kinds of users, whether you need basic monitoring or advanced features.
Prerequisites for Setting Up Ivideon
Before you start the setup process, ensure you have the following:
Security Camera(s): Make sure your security camera is compatible with Ivideon. Most IP cameras and webcams are supported, but you should verify your camera’s compatibility on the Ivideon website.
Stable Internet Connection: Ivideon requires a reliable internet connection to stream and upload footage to the cloud.
Smartphone/Tablet or Computer: You will need a device to access Ivideon and monitor the video feeds.
Ivideon Account: You will need to create an Ivideon account if you haven’t already.
Now that you have everything in place, let’s dive into the steps to set up Ivideon.
Step-by-Step Guide to Set Up Ivideon App for Security Camera Monitoring
Step 1: Create an Ivideon Account
The first step in setting up Ivideon is to create an account.
Visit the Ivideon Website: Go to the Ivideon official website (www.ivideon.com) on your computer or mobile device.
Sign Up: Click on the "Sign Up" button and provide the necessary details, such as your name, email address, and password. Alternatively, you can sign up using your Google or Facebook account.
Verify Your Email: After registration, Ivideon will send a verification email to the address you provided. Click the verification link to complete the account setup process.
Login to Your Account: Once your account is verified, log in to Ivideon with your credentials.
Step 2: Install Ivideon App on Your Device
To monitor your security cameras, you’ll need to install the Ivideon app on your smartphone, tablet, or computer.
For Smartphones/Tablets (iOS/Android):
Go to the App Store/Google Play Store: Open the App Store if you’re using an iPhone or iPad, or the Google Play Store if you’re using an Android device.
Search for Ivideon: Type “Ivideon” in the search bar and tap on the official Ivideon app.
Install the App: Tap on “Install” or “Get” to download and install the app on your device.
Open the App: Once installed, open the Ivideon app and log in using the account credentials you created earlier.
For Computers (Windows/Mac):
Download Ivideon Server: Go to the Ivideon website and navigate to the “Download” section. Download the Ivideon Server software for your operating system (Windows or Mac).
Install the Software: Run the installer and follow the on-screen instructions to install Ivideon Server.
Launch Ivideon Server: After installation, open the Ivideon Server software and log in with your account credentials.
Step 3: Connect Your Camera(s) to Ivideon
Now it’s time to connect your security cameras to Ivideon.
Launch Ivideon Server: If you’re using a computer, open the Ivideon Server software. If you’re using a mobile device, open the Ivideon app.
Add a Camera:
On Ivideon Server (Windows/Mac): Click on the “Add Camera” button and enter your camera’s details (IP address, username, and password). Ivideon will automatically detect the camera and start streaming the video feed.
On Ivideon App (Mobile): Tap on the “Add Camera” option, scan the QR code on your camera or manually input the camera’s IP address, username, and password.
Adjust Camera Settings: Once the camera is added, you can adjust settings such as video quality, motion detection, and alert preferences.
Test the Camera Feed: After configuring the camera, make sure to test the video feed. You should be able to view live footage from your security camera on your device.
Step 4: Configure Motion Detection and Alerts
One of the key features of Ivideon is motion detection, which helps you receive instant notifications when there is suspicious activity.
Enable Motion Detection: Go to the camera settings and enable the motion detection feature. You can adjust the sensitivity to detect any movement in the camera’s field of view.
Set Up Alerts: In the same settings menu, configure how you want to receive alerts. Ivideon allows you to receive notifications via email, push notifications, or SMS when motion is detected.
Test Motion Detection: Walk in front of the camera to test if the motion detection feature is working correctly and if you receive alerts on your device.
Step 5: Set Up Cloud Storage
Ivideon offers cloud storage options for storing your footage safely.
Choose a Storage Plan: Ivideon offers several subscription plans with varying amounts of cloud storage. Choose a plan that suits your needs based on the number of cameras and the length of footage you want to store.
Enable Cloud Storage: After selecting a plan, enable cloud storage for your cameras. Ivideon will automatically upload footage to the cloud, allowing you to access it anytime.
Access Footage: You can access your stored footage through the Ivideon app or Ivideon Server, whether you’re looking for a specific event or reviewing past footage.
Step 6: Monitor Your Cameras Remotely
Now that your cameras are set up and configured, you can begin monitoring them remotely.
Access Your Cameras: Open the Ivideon app or Ivideon Server on your device, and you’ll be able to view the live feed from all connected cameras.
Watch Recordings: If you’ve enabled cloud storage, you can also view past footage stored in the cloud.
Control Your Cameras: Some cameras may allow remote control, such as pan and tilt features. You can use the Ivideon app or software to control your camera’s movement if supported.
Step 7: Maintain Your System
To ensure your security system continues to work effectively, make sure to:
Update Your App/Software: Regularly check for updates for the Ivideon app or Ivideon Server to ensure you have the latest features and bug fixes.
Check Camera Health: Ensure that your cameras are functioning properly and have a stable internet connection.
Review Storage Usage: Monitor your cloud storage to ensure you don’t run out of space, and upgrade your plan if necessary.
Conclusion
Setting up Ivideon to monitor your security cameras is a simple and effective way to keep your property safe. By following the steps outlined in this guide, you can quickly install and configure Ivideon, enabling you to remotely access live video feeds, receive motion alerts, and store footage in the cloud for later review. With its user-friendly interface, cloud storage options, and affordable plans, Ivideon is an excellent choice for anyone looking to enhance their security system.
Start using Ivideon today to keep your property protected, no matter where you are!
Trending Now

Updates