Ivideon Client - Free Download
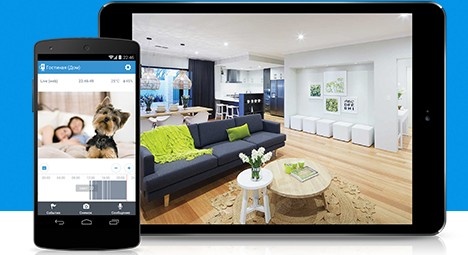
Ivideon is a popular cloud-based video surveillance solution that provides users with remote monitoring, recording, and event notifications for their cameras. Whether you need to keep an eye on your home, office, or business, Ivideon offers a reliable and accessible platform to manage your security cameras from anywhere in the world.
The Ivideon Client is an essential tool for accessing and controlling your Ivideon cameras on your desktop or laptop. The Ivideon Client is available for both Windows and macOS and allows you to monitor live video feeds, review recorded footage, and configure camera settings—all from your computer.
In this comprehensive guide, we will walk you through the process of downloading and using the Ivideon Client on your Windows or macOS device. By the end of this guide, you'll be equipped with the knowledge to set up and start using Ivideon’s powerful features for your video surveillance system.
What is Ivideon Client?
The Ivideon Client is a desktop application that allows users to interact with their Ivideon cameras from their computers. It provides more advanced features compared to the mobile app and is perfect for those who need to monitor multiple cameras, manage camera settings, or access recorded footage on a larger screen.
Some of the key features of the Ivideon Client include:
Live Video Monitoring: Watch real-time video feeds from your cameras.
Event Logs: Access event logs and review recorded footage.
Cloud Integration: Sync with Ivideon’s cloud storage to save and access your recordings.
Camera Management: Add, configure, and manage your cameras in a centralized dashboard.
Multi-View Mode: Monitor multiple cameras simultaneously on a single screen.
Let’s dive into the process of downloading and using the Ivideon Client.
Download & Set Up Ivideon Client for Remote Monitoring
Step 1: Downloading Ivideon Client
Before you can start using Ivideon on your desktop or laptop, you need to download the Ivideon Client software. The process is simple, whether you’re using Windows or macOS.
1. Download Ivideon Client for Windows
To download the Ivideon Client for your Windows computer, follow these steps:
Visit the Ivideon Download Page: Go to the official Ivideon website’s download section by visiting:
https://www.ivideon.com/downloads.
Choose the Windows Version: On the download page, locate the Windows section and click on the “Download for Windows” button.
Run the Installer: Once the download is complete, open the installation file (it will be named something like IvideonClientSetup.exe) and follow the on-screen instructions to install the software on your system.
Launch Ivideon Client: After the installation is complete, launch the Ivideon Client by double-clicking the Ivideon icon that appears on your desktop or in your Start menu.
2. Download Ivideon Client for macOS
To download the Ivideon Client for your Mac, follow these steps:
Visit the Ivideon Download Page:
Go to the Ivideon downloads page at:
https://www.ivideon.com/downloads.
Choose the macOS Version: Locate the macOS section and click the "Download for macOS" button.
Install the Software:
Once the download finishes, open the installer file (which will be named something like IvideonClient.dmg) and drag the Ivideon Client icon into your Applications folder.
Launch Ivideon Client:
After installation, open the Ivideon Client from your Applications folder or from Launchpad.
Step 2: Setting Up Ivideon Client
Once you’ve installed the Ivideon Client on your desktop or laptop, it’s time to set it up and start using it. The following steps will guide you through the initial setup process.
1. Create an Ivideon Account (If You Don’t Have One)
To use the Ivideon Client, you must have an Ivideon account. If you haven’t already created one, follow these steps:
Open the Ivideon Client software.
On the login screen, click the Sign Up or Create Account button.
Enter your email address, name, and a password for your new account.
You will receive a verification email—click the verification link to complete the process.
Once you’ve verified your email, return to the Ivideon Client and proceed to log in.
2. Log In to Your Ivideon Account
Launch the Ivideon Client on your computer.
On the login screen, enter the email and password associated with your Ivideon account.
Click the Login button to access the Ivideon Client interface.
Step 3: Adding Cameras to Ivideon Client
After logging into the Ivideon Client, the next step is to add your cameras to the system. You can add a variety of cameras to Ivideon, including IP cameras, webcams, and DVR/NVR devices.
1. Adding IP Cameras
To add an IP camera to Ivideon, follow these steps:
Click on the "Add Camera" button on the Ivideon Client dashboard.
Enter the camera’s IP address, username, and password (for security cameras with a login).
Select the camera model or protocol from the list of compatible devices.
Click Add Camera and the camera should appear on the main screen.
2. Adding Webcams
To add a webcam:
Click the "Add Camera" button and select Webcam from the list of available options.
Select your webcam from the drop-down menu.
Click Add Camera to add it to the Ivideon Client.
3. Adding DVR/NVR Devices
If you have a DVR or NVR system, you can easily add it to Ivideon by following these steps:
Choose DVR/NVR from the camera type list.
Enter the required login credentials and IP address of your DVR/NVR system.
Click Add Camera to integrate the DVR/NVR into the Ivideon Client.
Step 4: Monitoring Cameras Using Ivideon Client
Now that your cameras are added, you can start using the Ivideon Client to monitor them in real time. Here’s how to view live video feeds and manage your cameras.
1. Viewing Live Video Feeds
Once your cameras are added, you can monitor live feeds:
Select the camera you want to monitor from the list on the dashboard.
The live video feed will appear on the screen. You can adjust the view by zooming in or out.
To view multiple cameras at once, you can use multi-view mode to display up to 4, 9, or 16 cameras simultaneously.
2. Controlling PTZ (Pan-Tilt-Zoom) Cameras
If you have PTZ cameras, you can control their movement directly from the Ivideon Client:
Select the PTZ Camera from your dashboard.
Use the on-screen controls to pan, tilt, and zoom in or out.
Adjust the camera position in real time to focus on areas of interest.
3. Zooming and Adjusting Camera Settings
You can zoom into specific areas of the video feed by using the zoom feature in the Ivideon Client. Additionally, you can adjust camera settings such as:
Video Quality: Choose the resolution and frame rate.
Audio Settings: Adjust microphone volume if your camera supports audio.
Time and Date: Set the correct time zone for your camera.
Step 5: Accessing Recorded Footage
Ivideon offers cloud storage for your camera recordings, allowing you to access and review past footage at any time.
1. Viewing Recorded Video
To access recorded footage:
Click on the Archive button on the Ivideon Client dashboard.
Select the camera and the date of the footage you wish to review.
The footage will start playing, and you can use the controls to rewind, pause, or fast-forward.
2. Searching for Specific Events
You can search for specific events within your footage. Use the event search feature to find recordings triggered by motion detection or other events like:
Motion
Sound
Alarm triggers
Step 6: Managing Alerts and Notifications
One of the key features of Ivideon is the ability to receive alerts when suspicious activity is detected. The Ivideon Client allows you to set up and customize these notifications.
1. Setting Up Motion Detection Alerts
To enable motion detection alerts:
Go to the camera settings.
Enable motion detection for the selected camera.
Choose how sensitive you want the motion detection to be.
Set up alerts via push notifications or email to be notified whenever motion is detected.
2. Configuring Email and Push Notifications
You can configure email and push notifications to keep you informed of any events:
Go to Settings > Notifications.
Choose whether you want to receive alerts via email, SMS, or push notification.
Customize the types of alerts you wish to receive, such as motion detection or camera status changes.
Step 7: Advanced Features and Tips
1. Creating Multiple User Accounts
If you want to share camera access with other users, Ivideon allows you to create multiple user accounts. You can grant different permissions and set access levels for each user.
2. Setting Up Recording Schedules
For users who only need to record at certain times, Ivideon offers the ability to schedule recordings. Set up automatic recording schedules so your cameras only record when necessary.
Conclusion
The Ivideon Client is an essential tool for users who want to monitor their security cameras on a desktop or laptop. Whether you’re looking to view live footage, access recorded videos, or set up motion detection alerts, Ivideon provides an intuitive and feature-rich platform for comprehensive video surveillance. By following the steps outlined in this guide, you can easily download, set up, and begin using the Ivideon Client to enhance your security system.
Ivideon makes video surveillance more accessible and convenient, ensuring that you can keep an eye on your property anytime, anywhere.
Trending Now

Updates