Ivideon Server: Download, Configure & Manage Your Cameras
In today’s world, security is more than just a priority—it’s essential. With the rise of advanced video surveillance technologies, being able to remotely monitor your home or business through security cameras is no longer a luxury, but a necessity. One such powerful tool for achieving this is the Ivideon Server, a versatile software that allows users to connect and monitor their security cameras from anywhere in the world.
In this guide, we will walk you through the process of downloading, installing, and using Ivideon Server, a solution that empowers users to easily manage their surveillance systems with cloud-based storage, remote monitoring, and advanced features. Whether you’re setting up the server for a personal home security system or a business network of cameras, this guide has everything you need to get started.
What is Ivideon Server?
Ivideon Server is a software application developed by Ivideon to help users manage and monitor their IP cameras and video surveillance systems. Unlike basic video management software, Ivideon Server integrates with the Ivideon cloud platform, allowing users to view live video feeds, store footage in the cloud, and receive alerts remotely. It is compatible with a variety of security cameras, providing flexibility for users to incorporate existing hardware into their system.
Key features of Ivideon Server include:
Cloud-based video storage: Your footage is stored securely on the Ivideon cloud, eliminating the need for expensive on-site storage solutions.
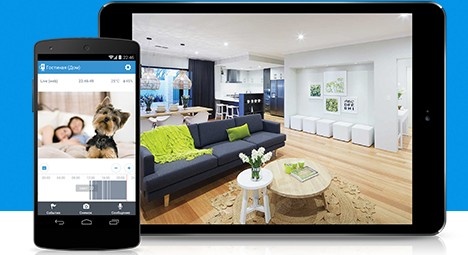
Remote monitoring: View live footage and past recordings from anywhere using the Ivideon mobile app or desktop client.
Motion detection alerts: Receive notifications whenever motion is detected by your cameras.
Multi-camera support: Manage multiple cameras from a single interface, ideal for home and business surveillance.
Security and encryption: Ivideon Server ensures secure video transmission with end-to-end encryption.
By the end of this guide, you'll know how to set up Ivideon Server, configure your cameras, and take full advantage of all the features it offers for enhanced security monitoring.
How to Download & Use Ivideon Server for Camera Monitoring?
Step 1: Download Ivideon Server
The first step to getting started with Ivideon Server is downloading the software to your computer or device. Ivideon Server is compatible with both Windows and macOS, and the process of downloading the application is simple and straightforward.
For Windows:
Visit the Ivideon Website: Go to the official Ivideon website (https://www.ivideon.com/).
Navigate to the Downloads Section: From the main menu, select "Downloads" and then choose the version of Ivideon Server for Windows.
Download the Installer: Click the “Download” button to begin downloading the Ivideon Server installer for Windows.
Run the Installer: Once the file is downloaded, open the installer to start the installation process. You may be prompted to allow the application to make changes to your device, so click “Yes” when prompted.
Follow the Installation Instructions: The Ivideon Server installation wizard will guide you through the process. Follow the on-screen instructions, and choose the installation directory.
For macOS:
Go to the Ivideon Website: Navigate to the Ivideon download page on the official website.
Select macOS Version: Under the downloads section, click on the macOS version of Ivideon Server.
Download and Install: Once the file has been downloaded, open the .dmg file, drag Ivideon Server to the "Applications" folder, and launch the application.
Step 2: Create an Ivideon Account
Before you can start using Ivideon Server, you need an Ivideon account to link your cameras and manage your surveillance system.
Sign Up for an Account: Open Ivideon Server after installation, and you'll be prompted to create a new account if you don’t have one. Simply enter your email address, create a strong password, and follow the verification steps.
Log In: Once your account is created and verified, log in using your credentials.
Alternatively, if you already have an Ivideon account, just log in using your existing username and password.
Step 3: Configure Ivideon Server Settings
Once logged in, you can begin configuring Ivideon Server to work with your security cameras. Ivideon Server offers a variety of settings for managing cameras, notifications, and cloud storage.
1. Adding Your Cameras:
Connect Your Cameras: Depending on your camera model, you’ll either need to enter the camera’s IP address or scan the QR code on the camera to establish the connection.
Camera Compatibility: Ivideon Server supports ONVIF and other popular camera protocols, ensuring compatibility with most IP cameras.
Test the Connection: After entering the necessary details, Ivideon Server will automatically test the connection and display the camera feed on your dashboard if everything is set up correctly.
2. Adjust Camera Settings:
Camera Name: You can assign a custom name to each camera for easy identification (e.g., Front Door, Office).
Resolution and Frame Rate: Configure the video quality settings, such as resolution (HD, 4K, etc.), and frame rate for optimal performance.
Motion Detection: Set up motion detection zones to monitor specific areas of your camera’s field of view. Ivideon Server will notify you whenever motion is detected within these zones.
3. Enable Cloud Storage:
Ivideon Server allows you to securely store your video footage in the cloud. Configure cloud storage settings to specify how long footage should be stored and ensure that you have enough space in your Ivideon account.
4. Set Up Alerts and Notifications:
Ivideon Server can send you alerts for various events, such as motion detection, camera disconnection, or abnormal activity. You can set preferences for these alerts, including notifications via email, mobile app, or desktop.
Customize Alert Sensitivity: Adjust the sensitivity of motion detection to avoid false alarms triggered by non-relevant movement.
Step 4: Start Monitoring with Ivideon Server
With your cameras connected and settings configured, you can begin monitoring your surveillance system. Ivideon Server offers a user-friendly interface for live video streaming, reviewing past footage, and managing camera settings.
1. Live Monitoring:
Open Ivideon Server and view live video feeds from your connected cameras. You can monitor multiple cameras simultaneously in a split-screen layout or focus on one camera at a time.
Control Camera PTZ: If your cameras support Pan-Tilt-Zoom (PTZ), you can control the movement of the cameras directly from the Ivideon Server interface.
2. View Recorded Footage:
Ivideon Server allows you to view stored footage, either by searching through your timeline or using the date/time filters to locate specific events.
Cloud Playback: You can access stored footage from anywhere using Ivideon’s cloud platform, so there’s no need for a dedicated local server for storage.
3. Remote Access:
Ivideon Server’s cloud integration means you can access live video feeds and recordings remotely from any device with internet access. Simply log in to your Ivideon account via the mobile app or desktop software, and you’ll have access to your entire security network.
Step 5: Use Advanced Features
Ivideon Server includes advanced features that enhance your surveillance experience and streamline monitoring.
1. Multiple Camera Support:
Ivideon Server allows you to connect multiple cameras, making it ideal for businesses or homes with extensive surveillance needs. You can monitor all your cameras in one central location.
2. User Management:
If you have multiple users who need access to the cameras, you can set up different user profiles and permissions. For instance, you may allow one user to view footage but restrict them from making configuration changes.
3. Live Streaming:
You can use Ivideon’s live streaming feature to broadcast footage publicly or privately. This is useful for businesses that want to provide public access to certain areas of their premises or for personal use.
Step 6: Maintain Your Ivideon Server Setup
To ensure smooth operation, perform regular maintenance on your Ivideon Server setup.
Update Software: Ivideon regularly releases updates for Ivideon Server to enhance performance and security. Make sure to install any available updates to keep the system running optimally.
Monitor Storage: Regularly check your cloud storage usage and consider upgrading your plan if needed to avoid running out of space for important footage.
Test Cameras Regularly: Make sure all cameras are functioning properly by performing periodic checks. This includes verifying video quality and ensuring the cameras are still connected.
Conclusion
Ivideon Server is a powerful and flexible solution for managing and monitoring your security cameras remotely. With its cloud integration, advanced features, and easy-to-use interface, Ivideon Server makes video surveillance accessible to both homeowners and businesses alike. By following the steps in this guide, you can easily download, install, and configure Ivideon Server to create a robust security system tailored to your needs.
Whether you're looking to monitor your home for security, track employee activity at your business, or ensure your property remains secure, Ivideon Server provides a reliable and efficient solution. Start using Ivideon Server today, and enjoy the peace of mind that comes with knowing your property is being watched over 24/7.
Trending Now

Updates